
How to Punch Needle: A Complete Beginner’s Guide
5 min. read
Starting a new craft can feel overwhelming—but it doesn’t have to be. If you’ve been curious about punch needle embroidery, you’re not alone. This craft has been trending on TikTok and Instagram for its satisfying textures, cozy vibe, and beginner-friendly techniques.
At The Craft Club, we believe anyone can enjoy crafting, even if you’ve never held a needle before. That’s why we created our Punch Needle Coaster Kit: a simple, step-by-step way to try punch needle for the first time.
In this beginner’s guide, we’ll cover everything you need to know about how to punch needle, from what it is, to the tools you’ll need, to easy first projects.
What is Punch Needle?
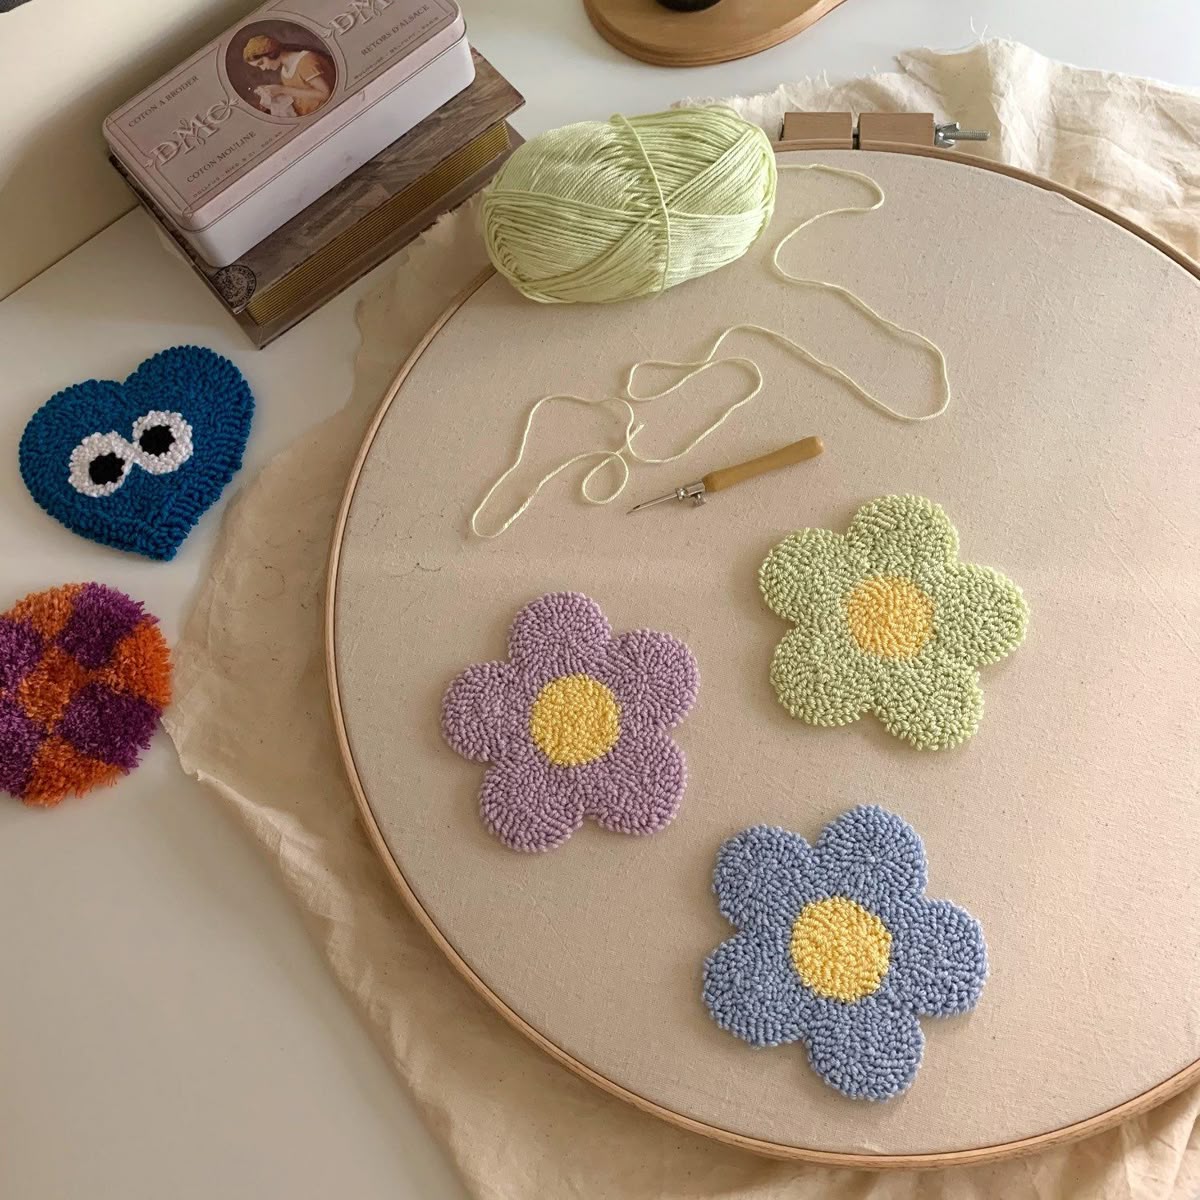
Punch needle is a form of embroidery that uses a hollow tool to punch yarn through fabric, creating loops on one side and smooth stitches on the other. The result is a textured surface that looks modern and handmade, similar to tufted rugs.
Unlike traditional embroidery, punch needle doesn’t require tiny, precise stitches. Instead, it’s all about repetition and rhythm, making it one of the most beginner-friendly embroidery crafts you can try.
You can use punch needle for a variety of projects: coasters, wall hangings, pillow covers, and even small rugs. But for beginners, coasters are the perfect first step.
Tools and Materials You’ll Need
To get started with punch needle, you’ll need just a few tools and materials. Our DIY punch needle kit includes all of these, but here’s the breakdown:
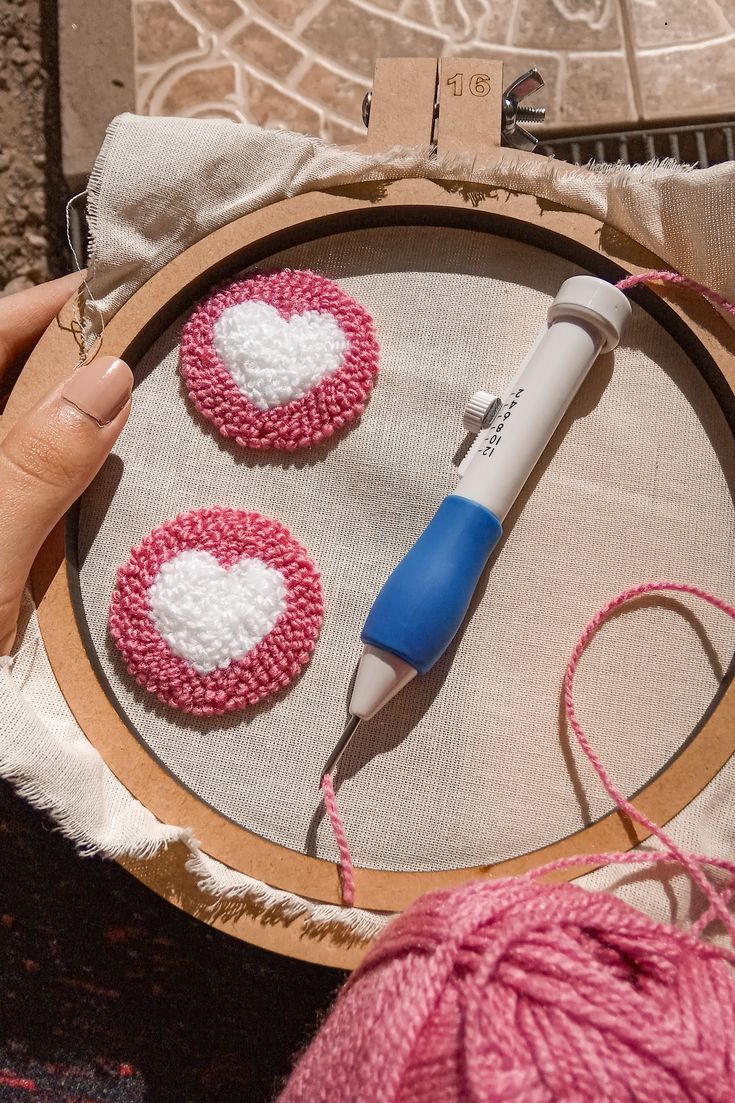
Punch Needle Tool – A special needle with a hollow shaft and adjustable depth.
Fabric – Typically monk’s cloth or linen, which allows the yarn to punch through easily.
Embroidery Hoop – Holds the fabric tightly in place while you work.
Yarn – Choose soft, medium-weight yarn that works well with your punch needle size.
Scissors – For trimming yarn as you finish your design.
Project Base – For example, coaster bases to finish your work neatly.
💡 Pro Tip: If you’re brand new, starting with a kit ensures you don’t buy the wrong size tool or fabric.
Step-by-Step: How to Punch Needle
Now let’s walk through the basic process of punch needle embroidery.
1. Prepare Your Fabric
Place your fabric in the embroidery hoop and pull it tight like a drum. The tighter the fabric, the easier it is to punch.
2. Thread the Needle
Use a wire threader (usually included with punch needles) to guide the yarn through the hollow tool. Thread from the handle to the tip, then pull a few centimeters of yarn out the end.
3. Start Punching
Push the needle straight down through the fabric until the handle touches the surface. Then lift the needle slightly and move it forward just a few millimeters before punching down again.
Each punch creates a loop of yarn on the back side of the fabric. Keep the needle angled in the direction you’re moving, and maintain a gentle rhythm.
4. Fill in Your Design
Outline your shape first, then fill in the center with rows of stitches. Work slowly and consistently for even loops.
5. Secure Your Yarn
When you’re done, simply trim the yarn close to the fabric. Because of the tension, the loops stay in place. For extra security, you can glue the back of your work once it’s finished.
"Once you get started, you can't stop!"
— Julie
Common Beginner Mistakes (and How to Fix Them)
Even though punch needle is beginner-friendly, a few common mistakes can happen. Here’s how to troubleshoot:
Loops keep coming out → Make sure your fabric is pulled tight enough in the hoop.
Uneven loops → Keep your punches at the same depth; don’t lift the needle too high.
Yarn tangles → Make sure your yarn feeds smoothly from the ball.
Fabric tears → Use the right fabric (like monk’s cloth) instead of tightly woven cotton.
The good news? Every mistake is fixable—just pull the yarn out and try again. That’s what makes punch needle so forgiving.
Easy Beginner Punch Needle Projects
When you’re starting out, choose small, achievable projects that let you practice without pressure. Here are three ideas:
Coasters – Quick to make and useful for your home.
Mini Wall Hanging – Frame your punch needle design for instant art.
Bookmarks or Patches – Fun, flat projects to test different patterns.
That’s why The Craft Club’s Punch Needle Coaster Kit is perfect for beginners—it gives you a small project that’s both fun and practical.
Why Punch Needle is a Relaxing Craft
Beyond the final product, one of the biggest reasons people love punch needle is the experience itself.
The repetitive motion is soothing and helps reduce stress.
It’s a great way to practice mindfulness, staying present in each stitch.
You can enjoy it while listening to music, sipping tea, or chatting with friends.
It’s no wonder punch needle is trending as one of the top relaxing crafts for adults.
Ready to Get Creative?
Punch needle is the perfect craft for beginners: quick to learn, relaxing, and rewarding. With just a few tools, you can create textured designs that are stylish, practical, and handmade by you.
If you’re ready to try it for yourself, our Punch Needle Coaster Kit has everything you need to get started. It’s the simplest way to explore this cozy, creative hobby and make something beautiful along the way.
✨ Ready to learn how to punch needle? Order your Punch Needle Coaster Kit today and start your first project tonight.